
Once the construction of Oracle Grid Infrastructure (GI) is complete, the next step is the construction of the Oracle 26ai RAC database. This article explains in detail everything from the installation of the database software to the creation of a cluster database using the Database Configuration Assistant (DBCA).
In conclusion, while the RAC installation for 26ai has become simpler than before with the adoption of image-based installation, the key to success lies in the ownership settings between nodes and the readiness of the shared storage (ASM).

- Conclusion: Shortest Step List for DB Construction
- Background and Basics: Key Points of 26ai RAC Configuration
- Step 1: Preliminary Preparation (Environment Variables and Directories)
- Step 2: Database Software Installation
- Step 3: Database Creation via DBCA
- Step 4: Post-Construction Operational Verification
- Troubleshooting
- Operational and Security Notes
- FAQ
- Summary
Conclusion: Shortest Step List for DB Construction
- Environment Variable Setting: Configure and apply the
.bash_profilefor theoracleuser. - Software Deployment: Extract the ZIP file obtained from Edelivery directly into the Oracle Home.
- Software Installation: Launch
runInstallerand deploy to all nodes. - Database Creation: Use
dbcato create a RAC database on the ASM disk group. - Status Verification: Check the startup status of the PDBs using
crsctland SQL*Plus.
Background and Basics: Key Points of 26ai RAC Configuration
In Oracle 26ai (based on 23ai), the Multitenant architecture is mandatory. Therefore, it is necessary to correctly understand the concepts of Container Database (CDB) and Pluggable Database (PDB) even in a RAC configuration.
Quick Note for Beginners
The installation of 26ai follows an “image-based” method where you create the directory first and extract the files there. Please note that the order is different from the traditional method of launching the Oracle Universal Installer (OUI) from runInstaller to select the installation destination.
Step 1: Preliminary Preparation (Environment Variables and Directories)
Using the directories created in Part 1, start the work as the oracle user. Note that this environment is configured in an Oracle VM environment.
1.1 Setting the .bash_profile for the oracle User
Configure this on both Node 1 and Node 2.
su - oracle
cat << EOF >> ~/.bash_profile
export ORACLE_SID=orcl1
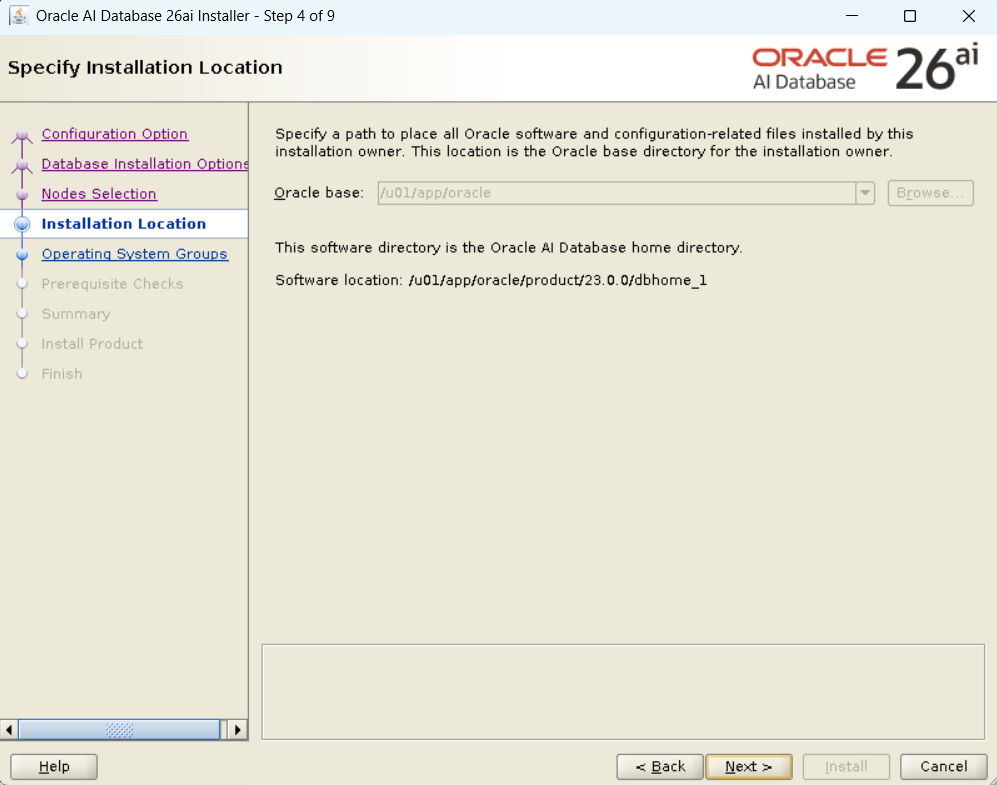
export ORACLE_BASE=/u01/app/oracle
export ORACLE_HOME=/u01/app/oracle/product/23.0.0/dbhome_1
export PATH=\$ORACLE_HOME/bin:\$ORACLE_HOME/OPatch:\$PATH
EOF
source ~/.bash_profile
1.2 Software Deployment
Extract the DB software obtained from the Oracle Software Delivery Cloud as the oracle user.
cd $ORACLE_HOME
unzip -q V1054592-01.zip -d $ORACLE_HOME
rm -rf V1054592-01.zip
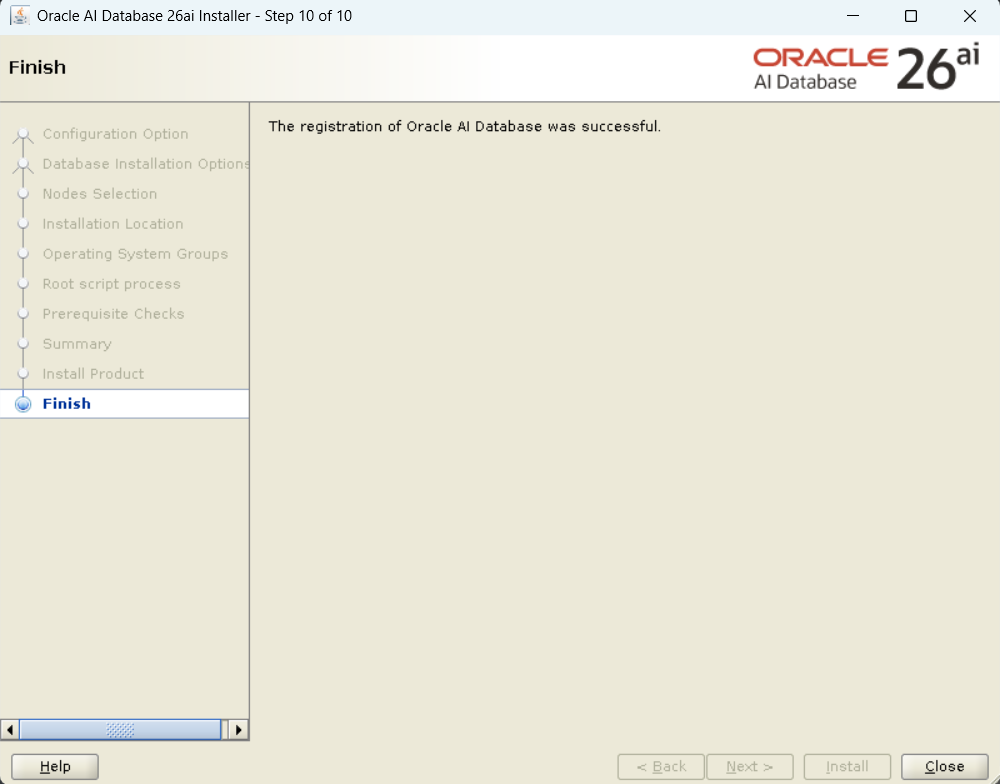
Step 2: Database Software Installation
First, perform the installation of the database engine only. Since this uses a GUI, execute it from Node 1.
# Execute on Node 1
cd $ORACLE_HOME
./runInstaller
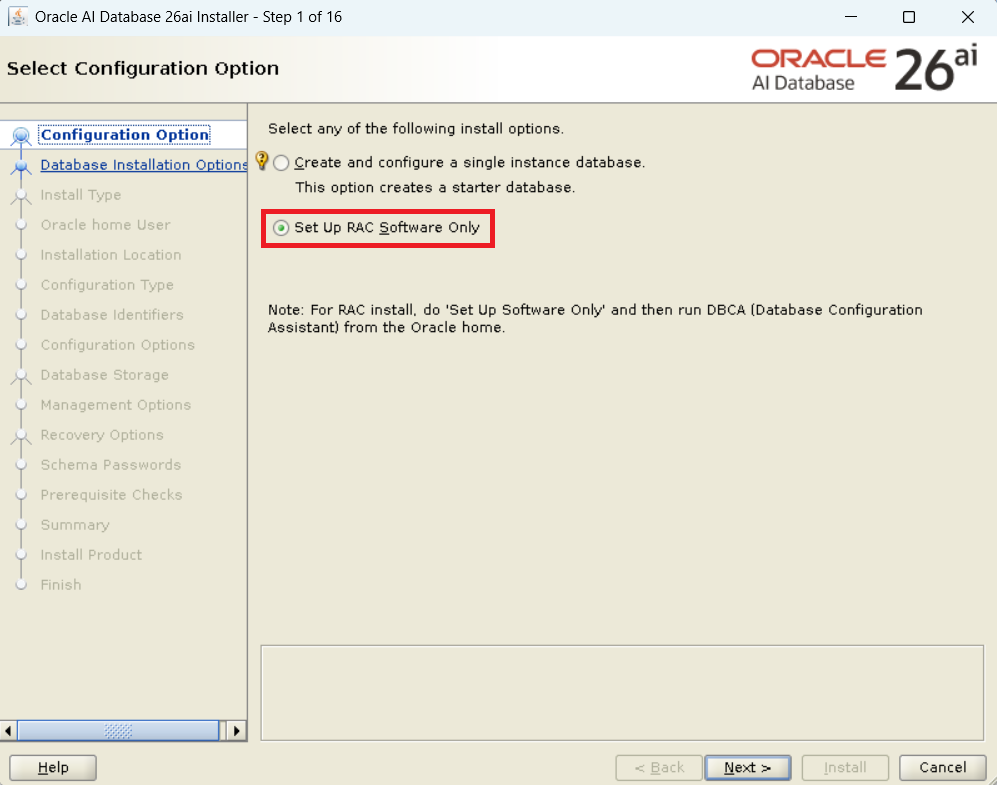
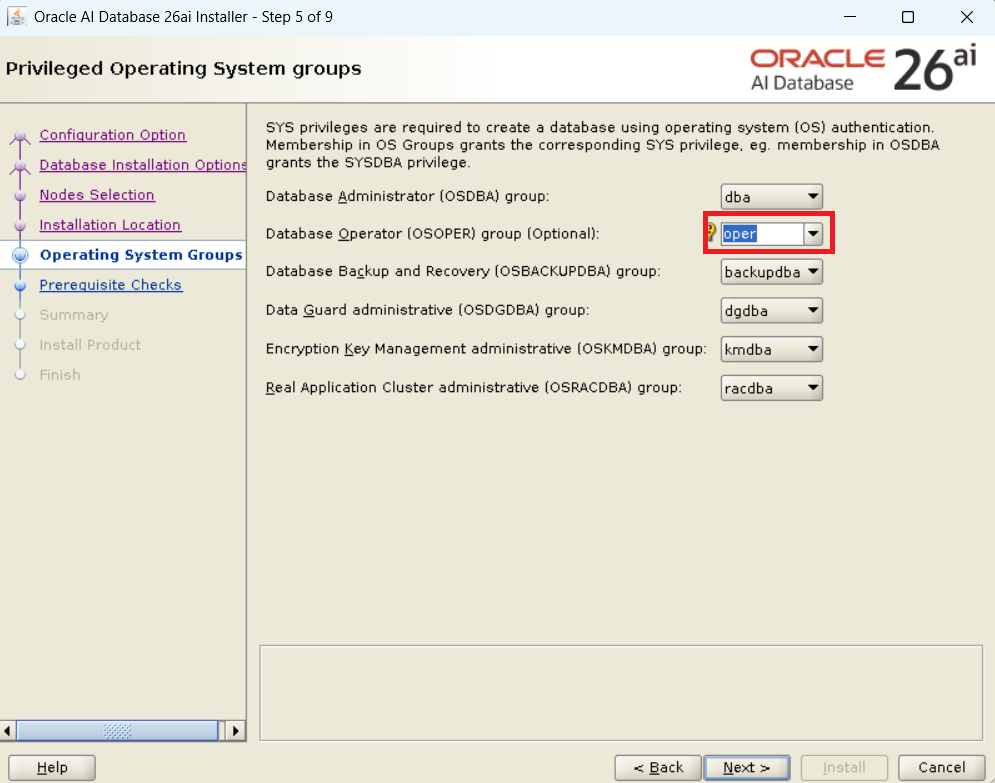
Key Selection Items:
- Configuration Option: Select “Set Up Software Only”.
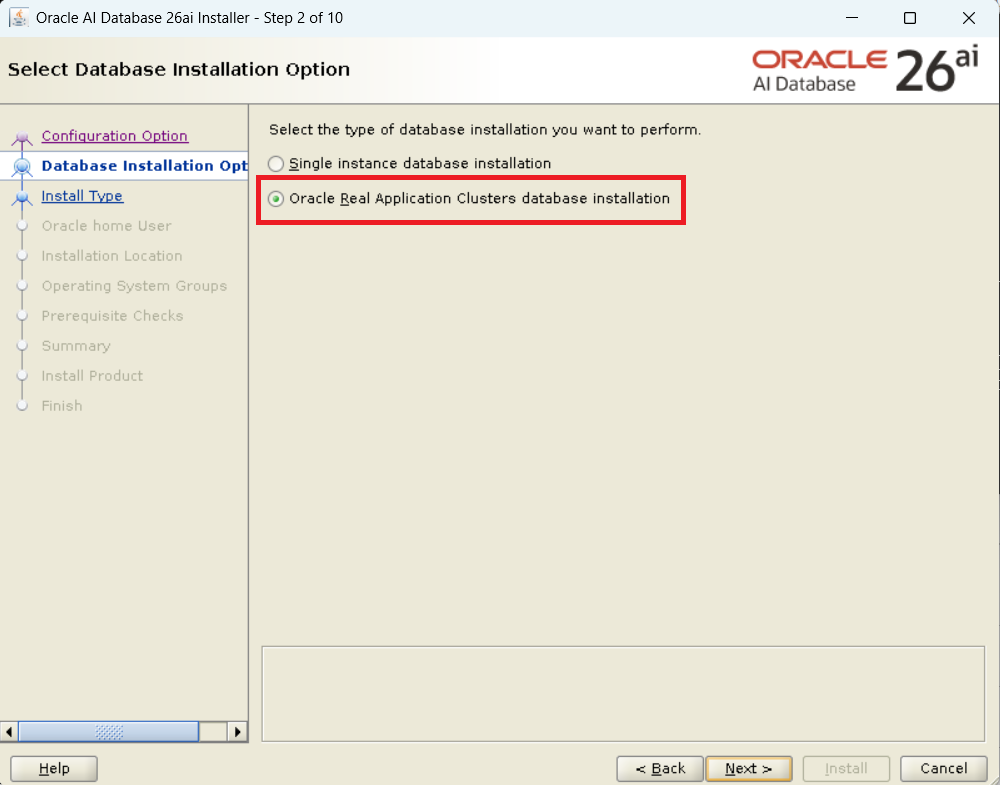
- Database Installation Type: Select “Oracle Real Application Clusters database installation”.
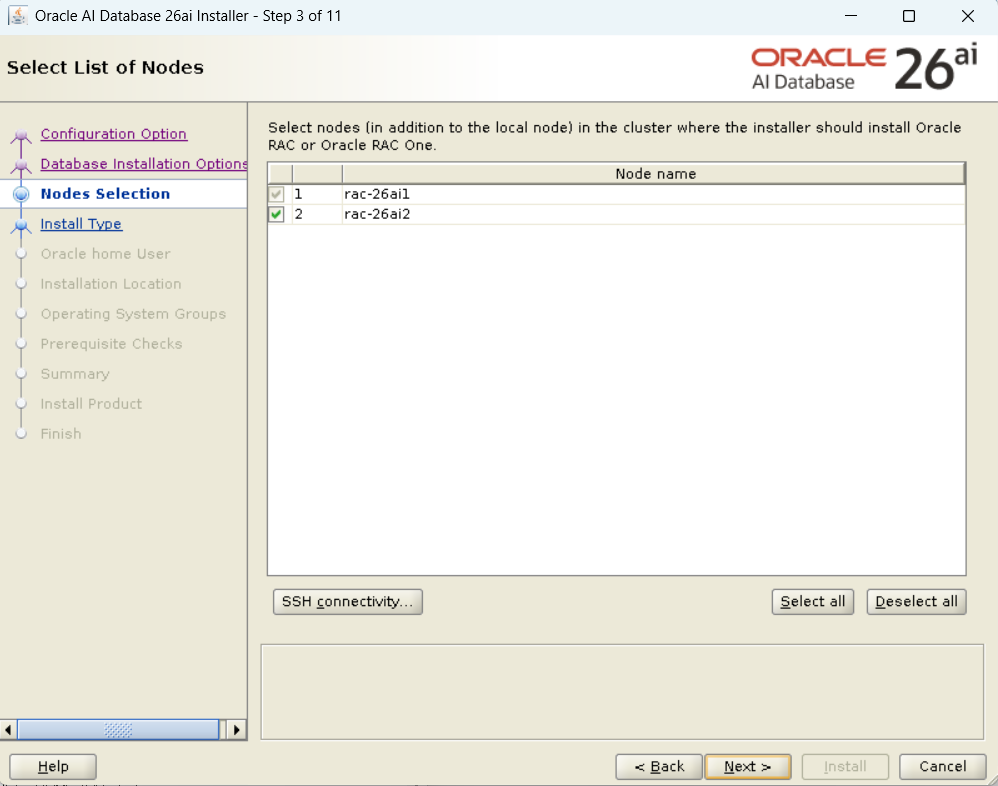
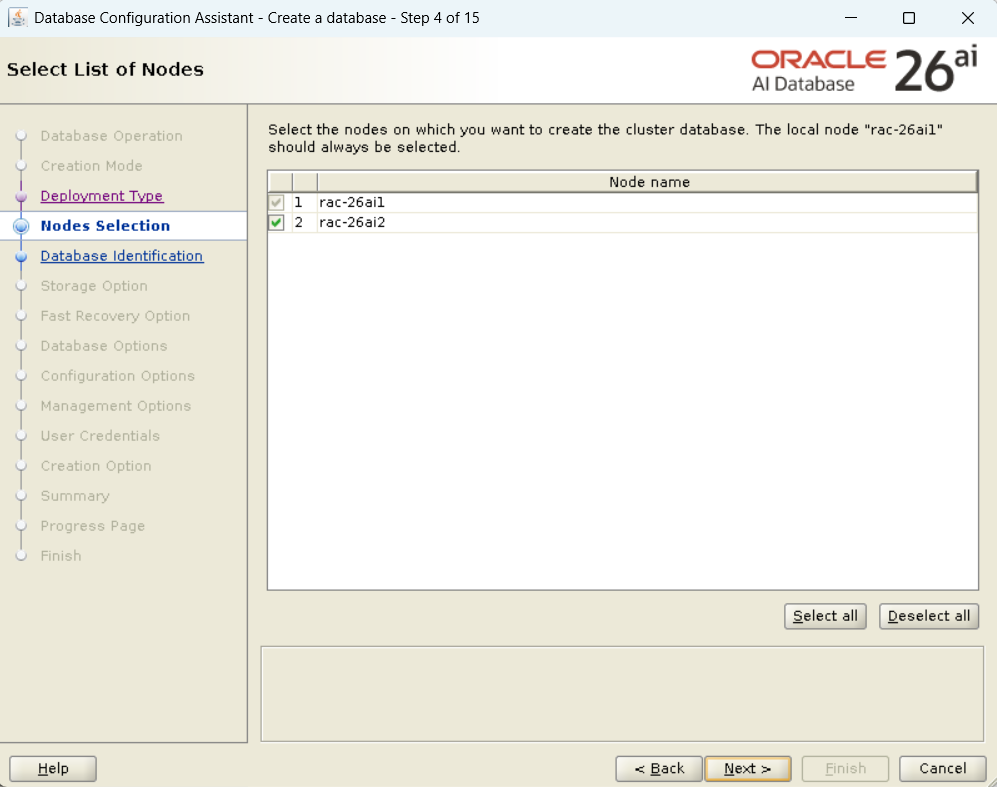
- Node Selection: Verify that
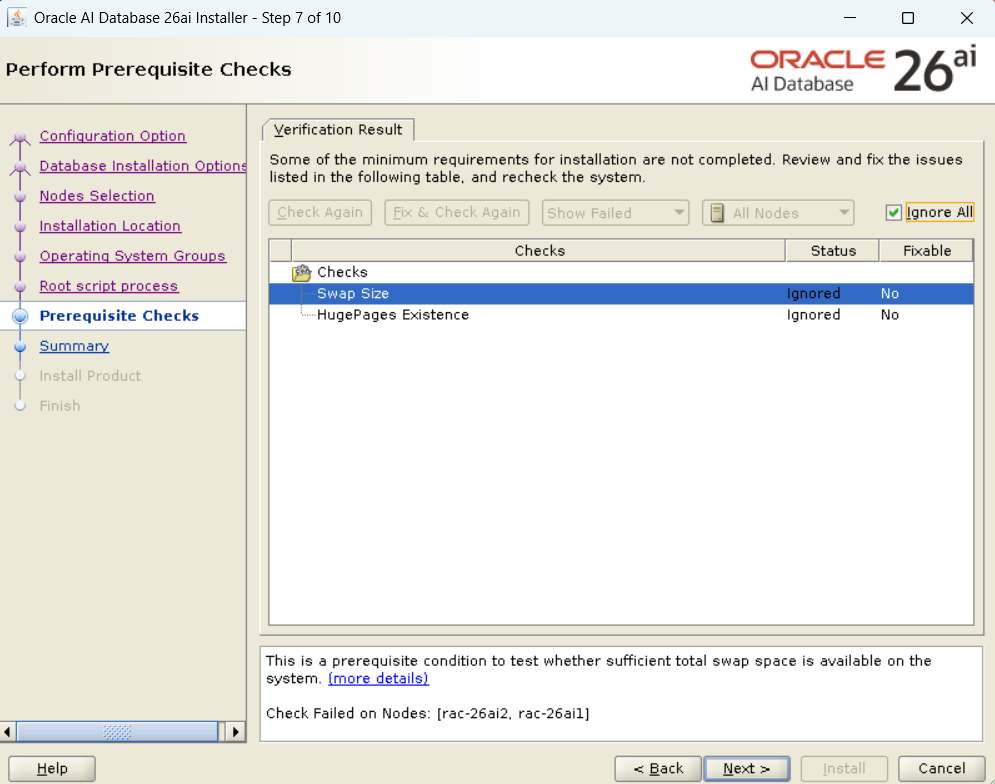
rac-26ai1andrac-26ai2are selected. - Prerequisite Check: If there are “Failed” items on the “Perform Prerequisite Checks” screen, be sure to fix them before executing “Check Again”.
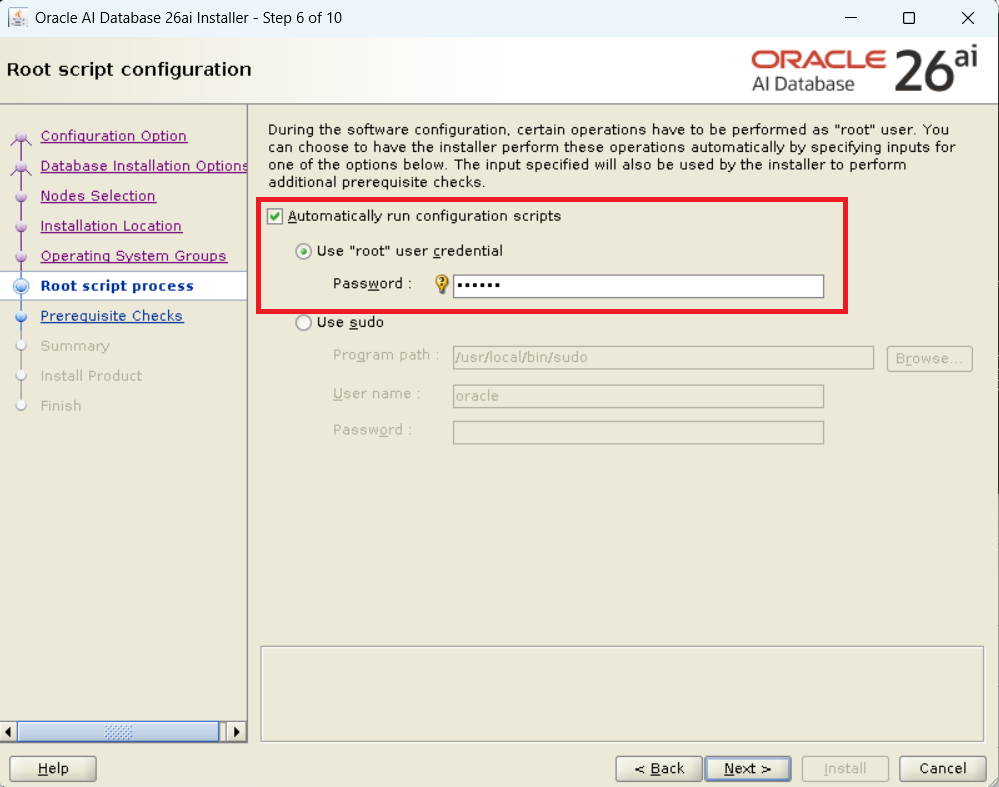
- Script Execution: Execute
root.shon both nodes as instructed near the end of the process.

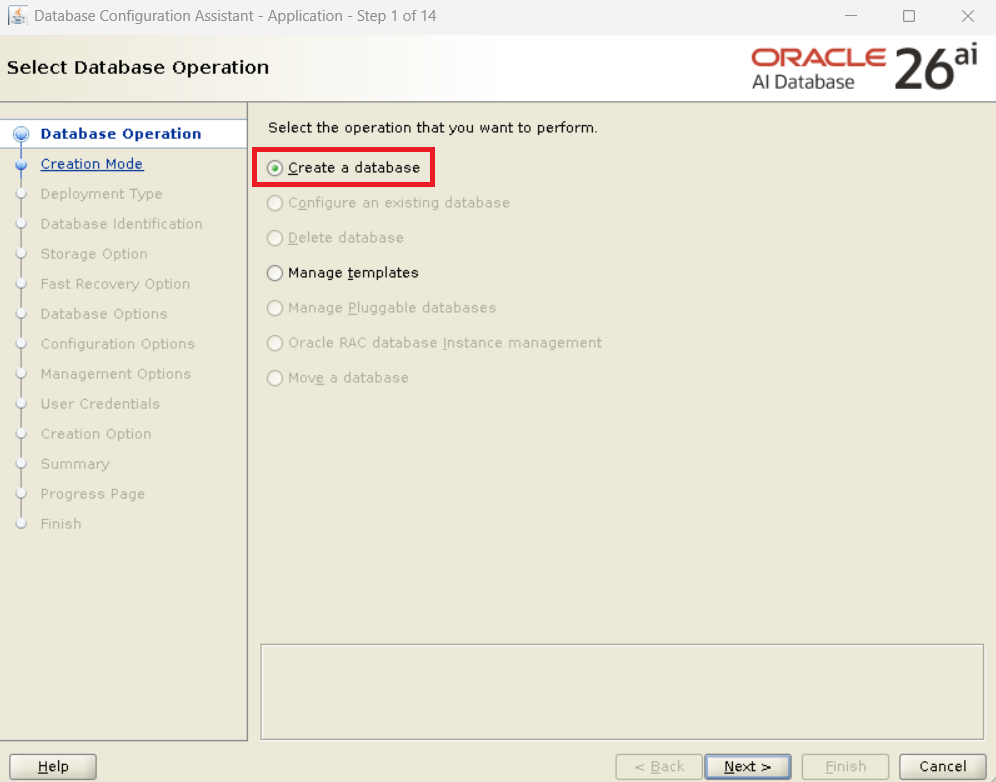
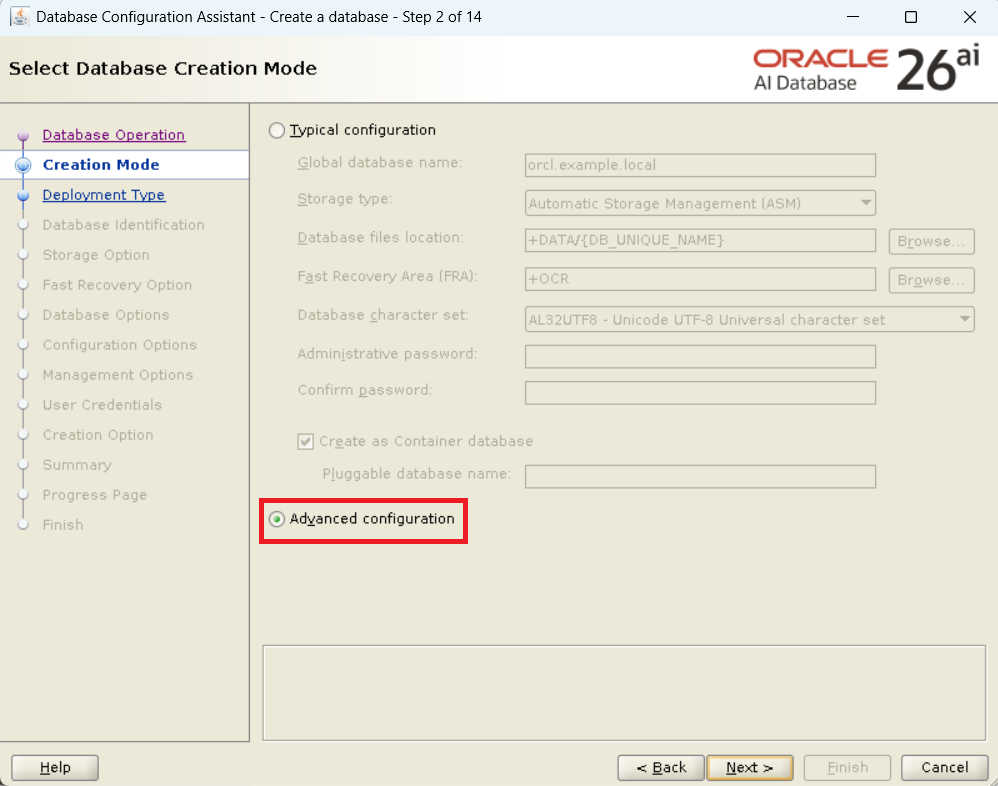
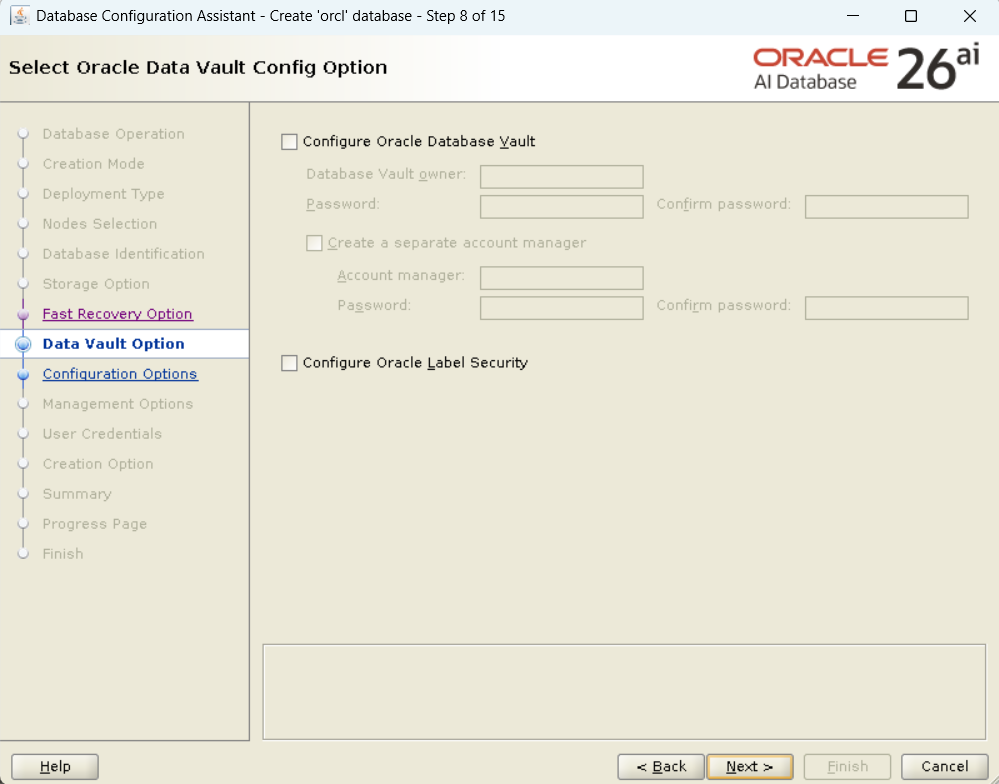
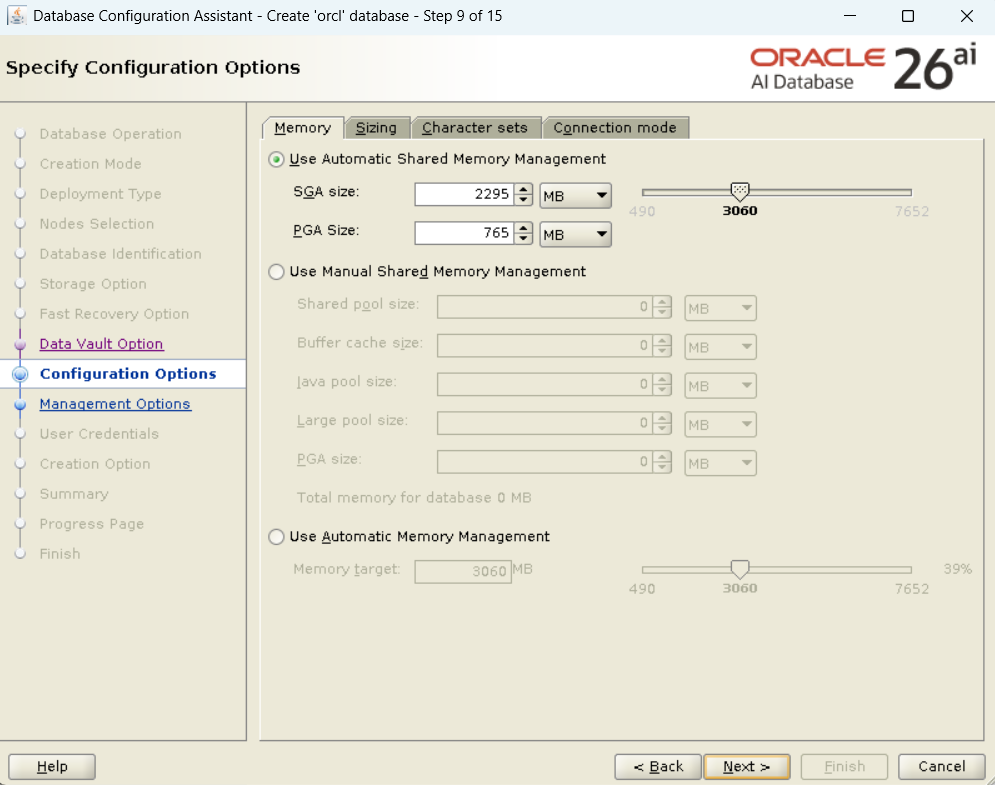
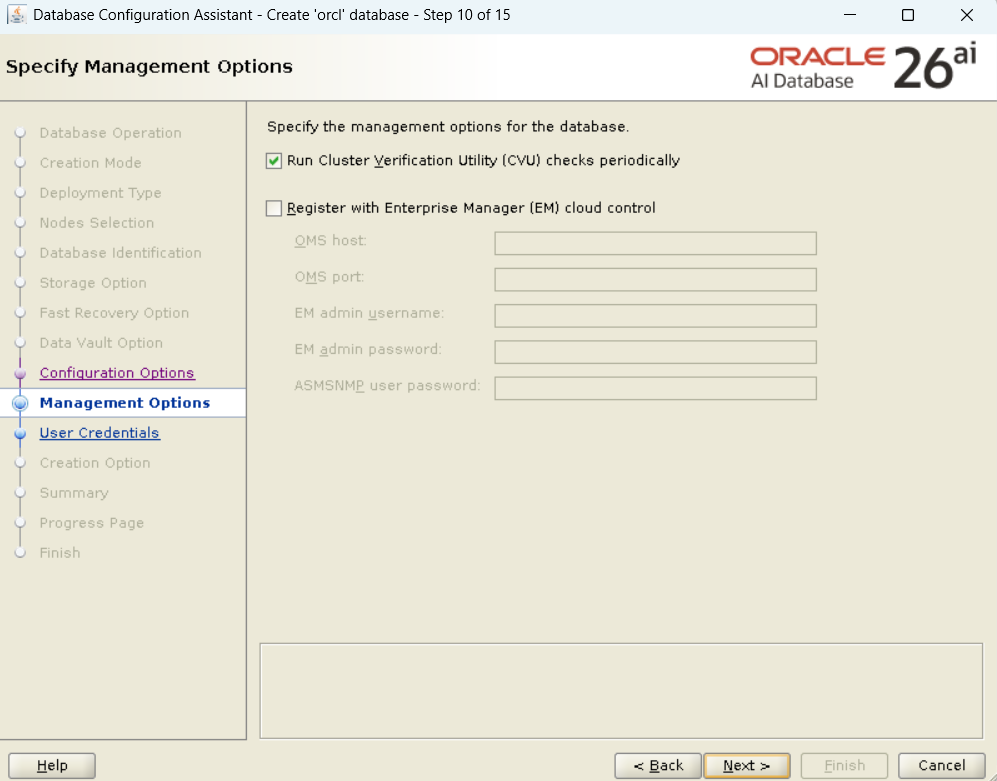
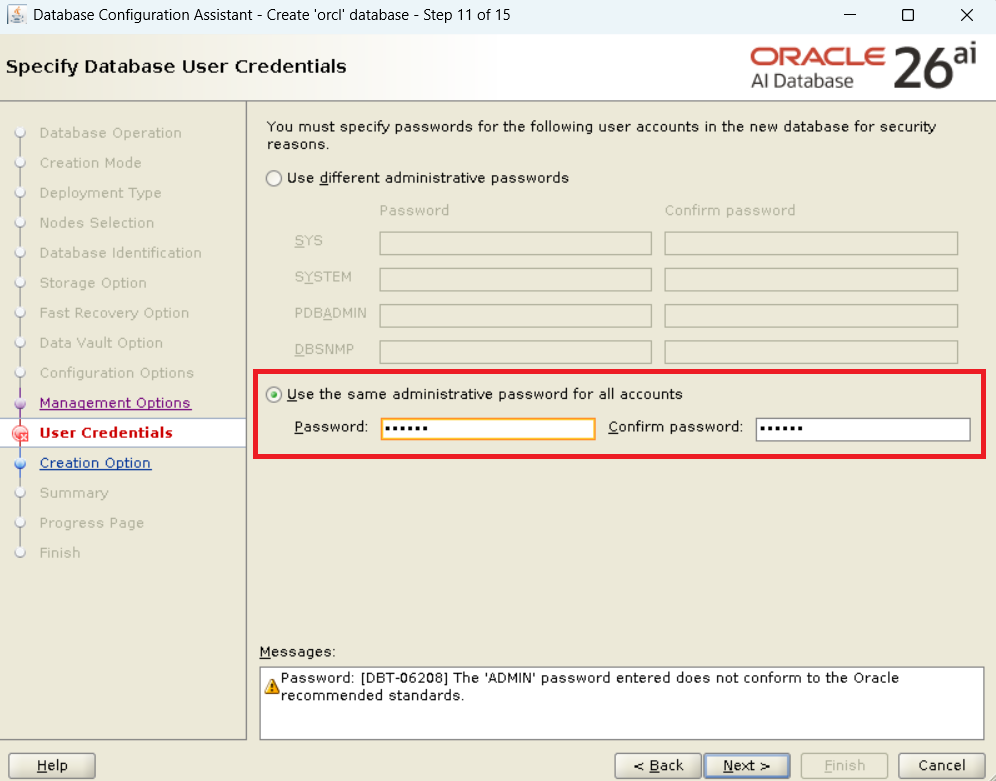
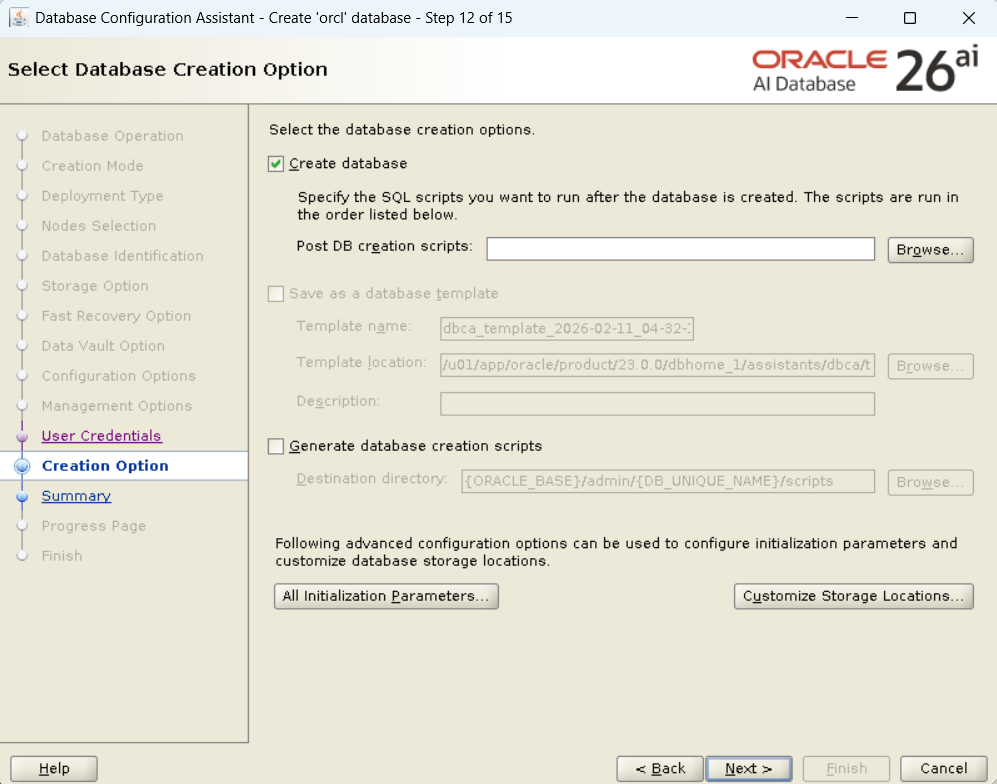
Step 3: Database Creation via DBCA
After the software installation, use dbca to create the database on the shared disk (ASM).
# Execute on Node 1
dbca
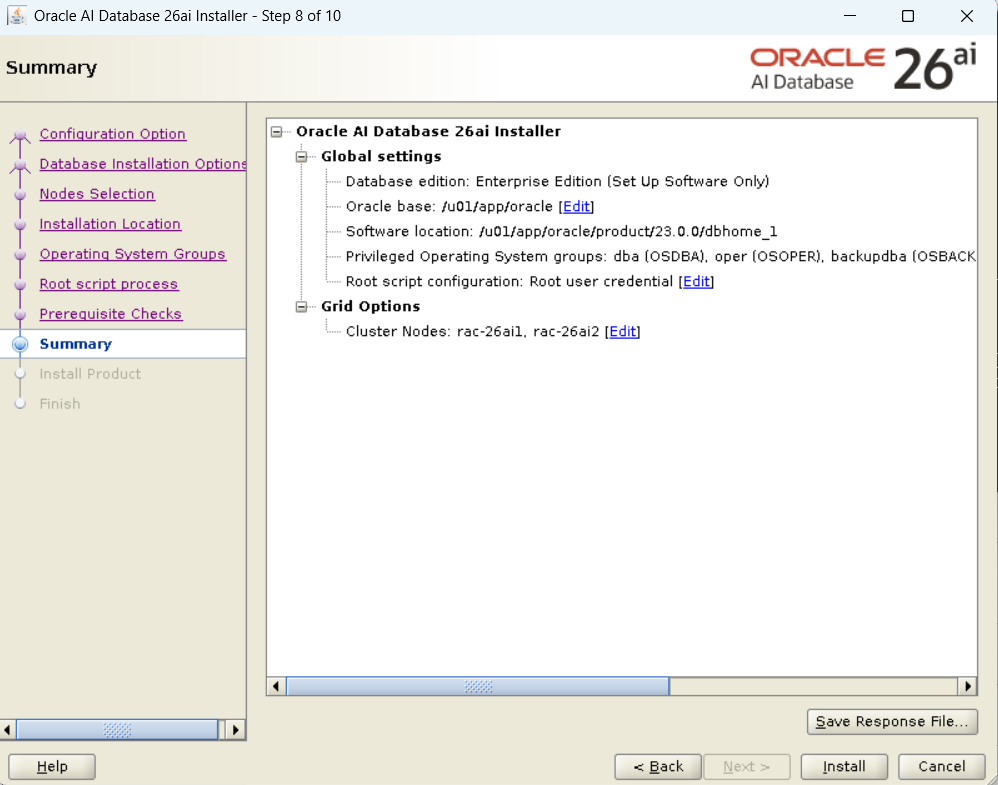
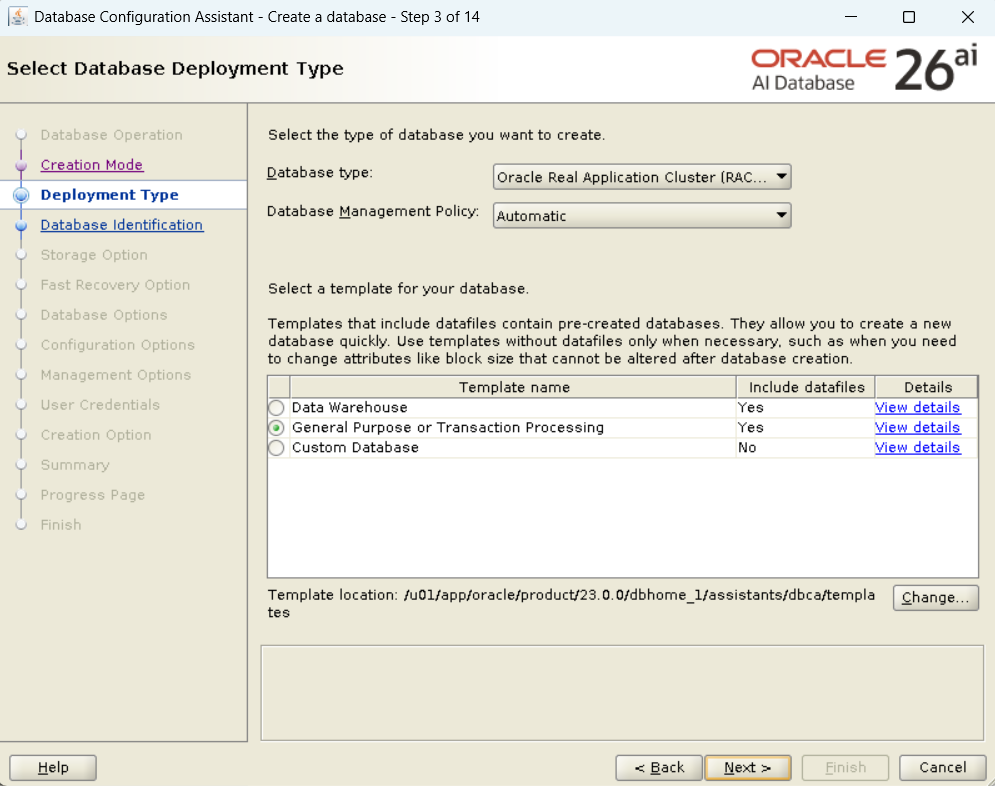
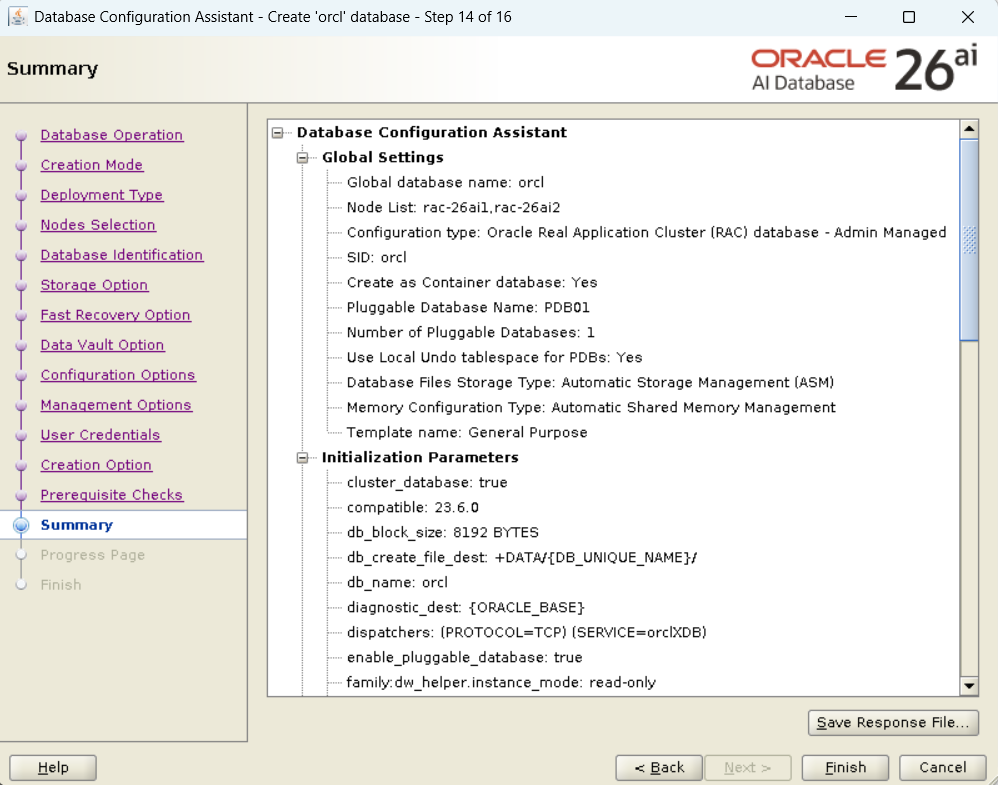
Key Configuration Values (for verification):
- Database Type: Oracle Real Application Clusters database
- Configuration Type: Admin-managed configuration
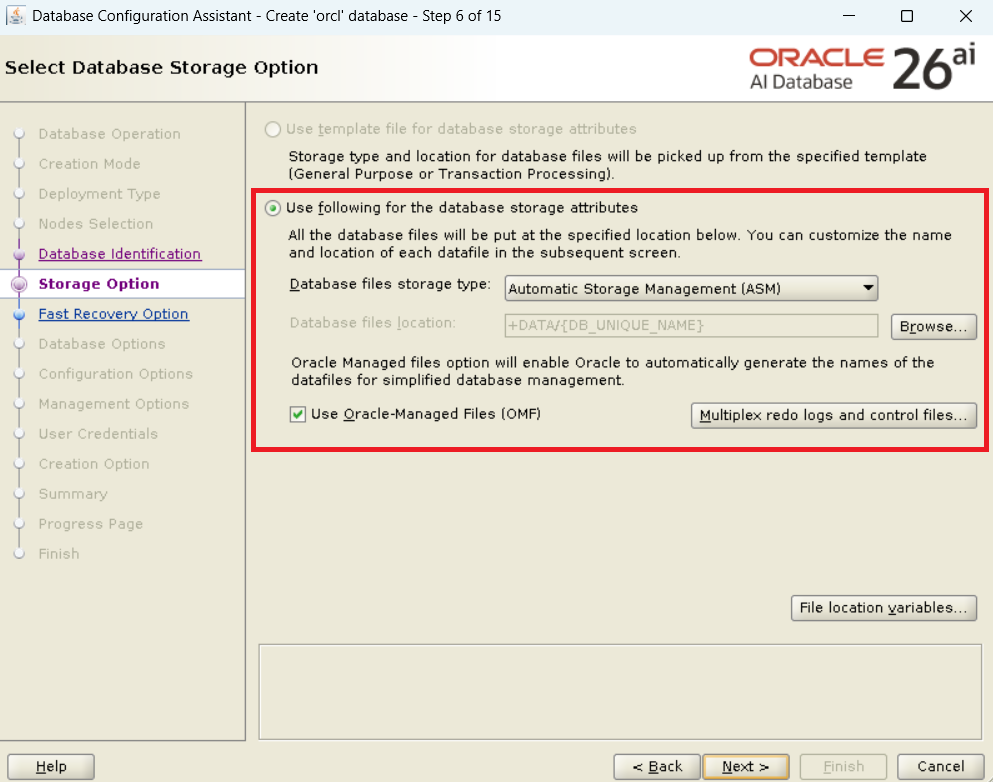
- Storage: ASM (Use the
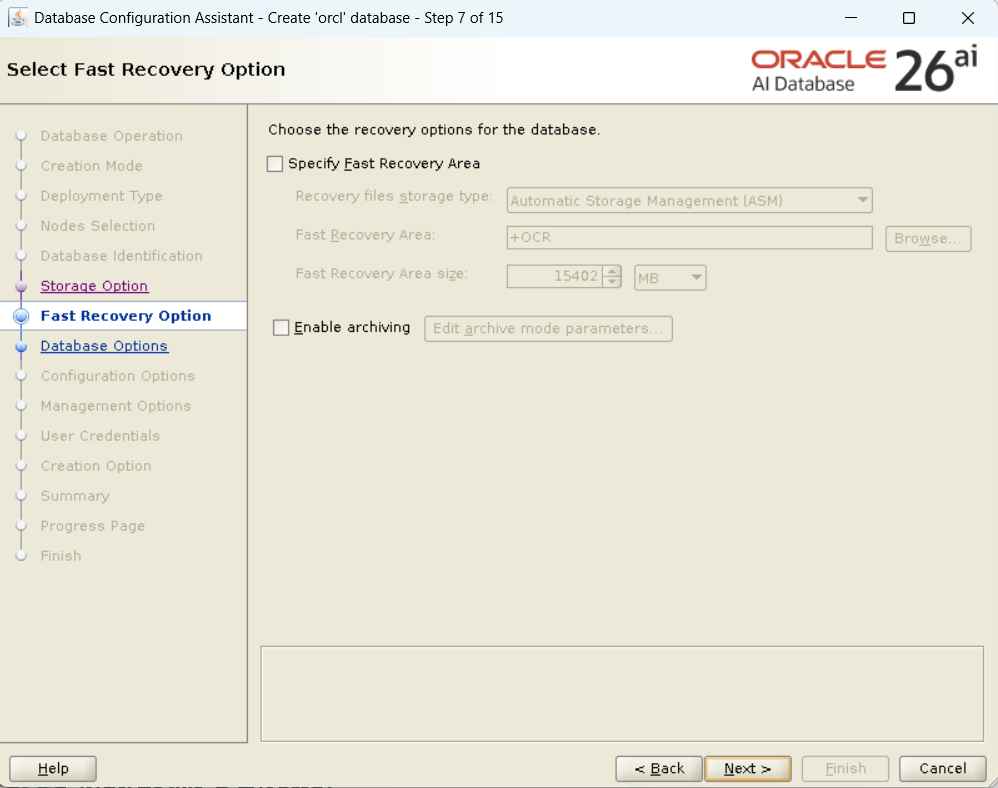
+DATAdisk group created in Part 1) - Fast Recovery Area: Specify
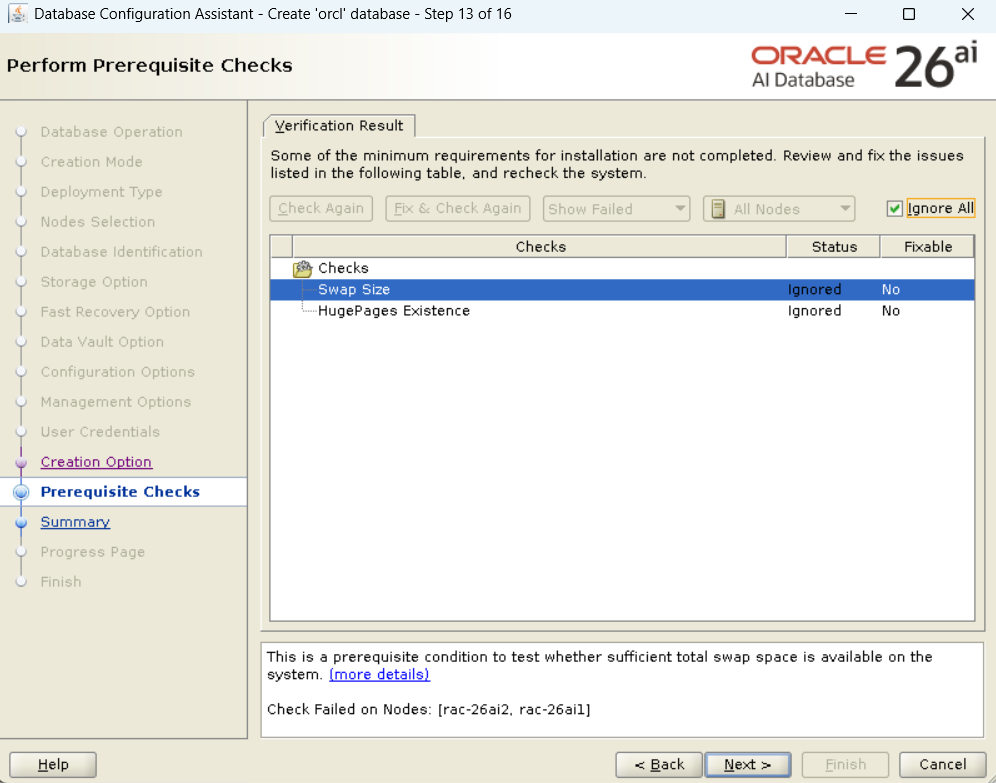
+DATAor another disk group as needed. - Prerequisite Check: If there are “Failed” items here as well, fix them and perform a re-check.
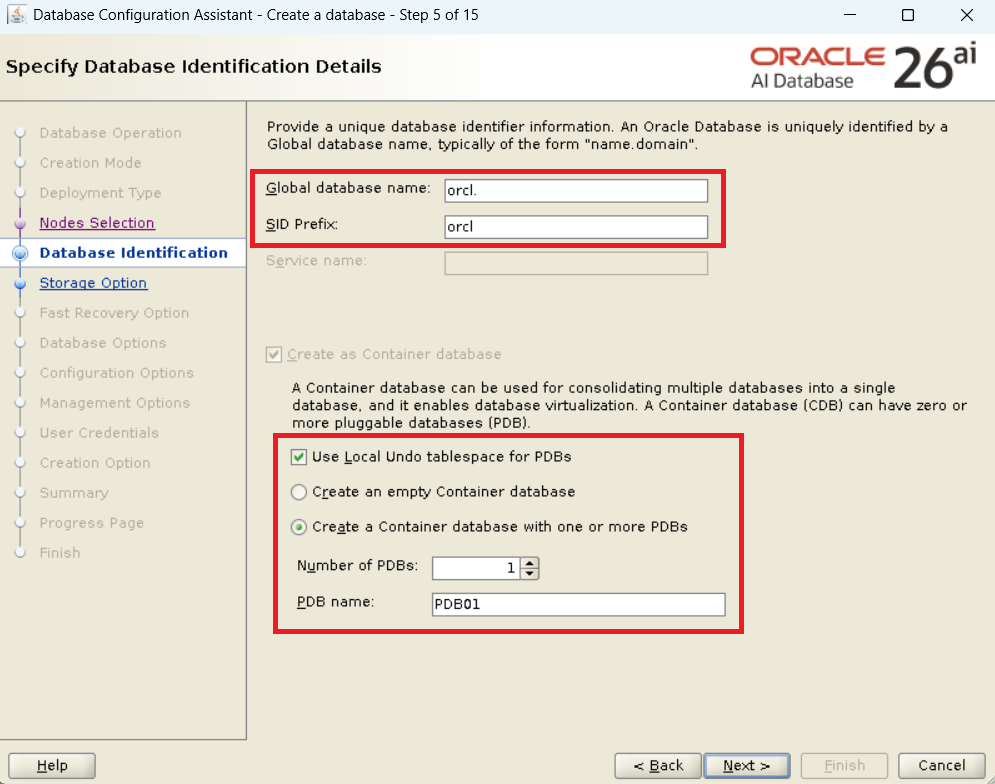
- Container Database: Yes (Mandatory in 26ai). Specify
pdb01as the PDB name.

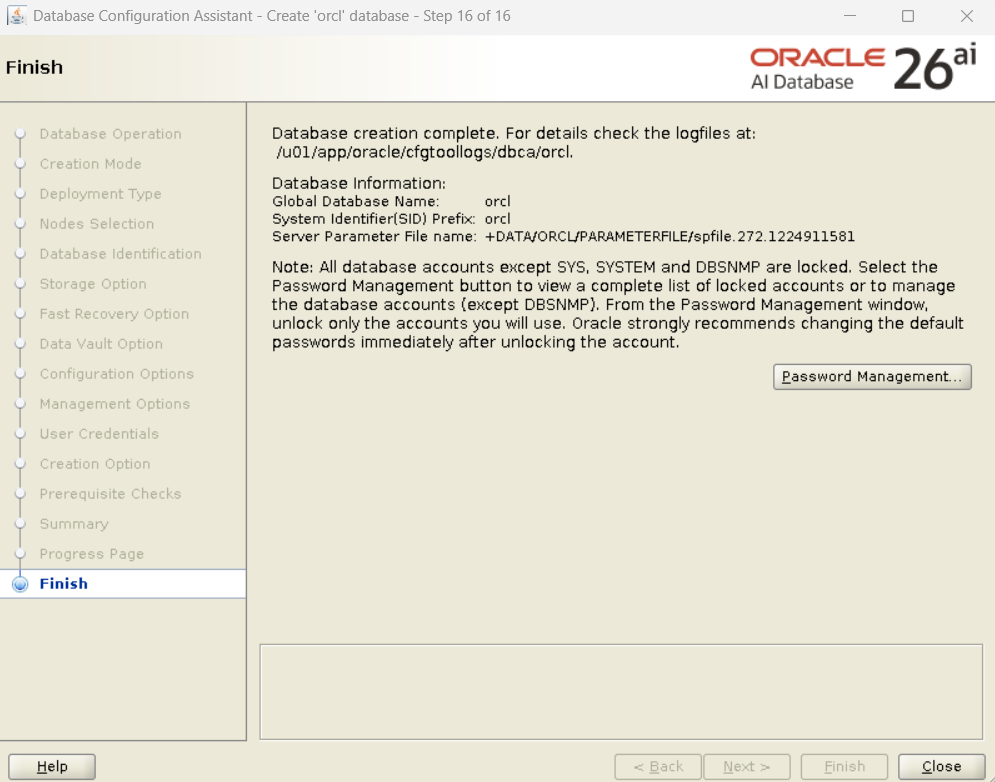
Step 4: Post-Construction Operational Verification
Once creation is complete, verify the status of the cluster resources and the database contents.
4.1 Verifying Cluster Resources
Switch to the grid user and check the resource status.
su - grid
crsctl stat res -t
It is normal if ora.orcl.db is ONLINE on each node and displayed as Open or READ WRITE.
[oracle@rac-26ai1 dbhome_1]$ su - grid
Password:
[grid@rac-26ai1 ~]$ crsctl stat res -t
--------------------------------------------------------------------------------
Name           Target  State        Server                   State details
--------------------------------------------------------------------------------
Local Resources
--------------------------------------------------------------------------------
ora.LISTENER.lsnr
               ONLINE  ONLINE       rac-26ai1                STABLE
               ONLINE  ONLINE       rac-26ai2                STABLE
ora.chad
               ONLINE  ONLINE       rac-26ai1                STABLE
               ONLINE  ONLINE       rac-26ai2                STABLE
ora.helper
               OFFLINE OFFLINE      rac-26ai1                STABLE
               OFFLINE OFFLINE      rac-26ai2                STABLE
ora.net1.network
               ONLINE  ONLINE       rac-26ai1                STABLE
               ONLINE  ONLINE       rac-26ai2                STABLE
ora.ons
               ONLINE  ONLINE       rac-26ai1                STABLE
               ONLINE  ONLINE       rac-26ai2                STABLE
--------------------------------------------------------------------------------
Cluster Resources
--------------------------------------------------------------------------------
ora.ASMNET1LSNR_ASM.lsnr(ora.asmgroup)
      1        ONLINE  ONLINE       rac-26ai1                STABLE
      2        ONLINE  ONLINE       rac-26ai2                STABLE
ora.DATA.dg(ora.asmgroup)
      1        ONLINE  ONLINE       rac-26ai1                STABLE
      2        ONLINE  ONLINE       rac-26ai2                STABLE
ora.LISTENER_SCAN1.lsnr
      1        ONLINE  ONLINE       rac-26ai1                STABLE
ora.LISTENER_SCAN2.lsnr
      1        ONLINE  ONLINE       rac-26ai1                STABLE
ora.LISTENER_SCAN3.lsnr
      1        ONLINE  ONLINE       rac-26ai2                STABLE
ora.OCR.dg(ora.asmgroup)
      1        ONLINE  ONLINE       rac-26ai1                STABLE
      2        ONLINE  ONLINE       rac-26ai2                STABLE
ora.asm(ora.asmgroup)
      1        ONLINE  ONLINE       rac-26ai1                Started,STABLE
      2        ONLINE  ONLINE       rac-26ai2                Started,STABLE
ora.asmnet1.asmnetwork(ora.asmgroup)
      1        ONLINE  ONLINE       rac-26ai1                STABLE
      2        ONLINE  ONLINE       rac-26ai2                STABLE
ora.cdp1.cdp
      1        OFFLINE OFFLINE                               STABLE
ora.cdp2.cdp
      1        OFFLINE OFFLINE                               STABLE
ora.cdp3.cdp
      1        OFFLINE OFFLINE                               STABLE
ora.cvu
      1        ONLINE  ONLINE       rac-26ai1                STABLE
ora.cvuhelper
      1        OFFLINE OFFLINE                               STABLE
ora.orcl.db
      1        ONLINE  ONLINE       rac-26ai1                Open,HOME=/u01/app/o
                                                             racle/product/23.0.0
                                                             /dbhome_1,STABLE
      2        ONLINE  ONLINE       rac-26ai2                Open,HOME=/u01/app/o
                                                             racle/product/23.0.0
                                                             /dbhome_1,STABLE
ora.orcl.orcl_pdb01.svc
      1        ONLINE  ONLINE       rac-26ai1                STABLE
      2        ONLINE  ONLINE       rac-26ai2                STABLE
ora.orcl.pdb01.pdb
      1        ONLINE  ONLINE       rac-26ai1                READ WRITE,STABLE
      2        ONLINE  ONLINE       rac-26ai2                READ WRITE,STABLE
ora.rac-26ai1.vip
      1        ONLINE  ONLINE       rac-26ai1                STABLE
ora.rac-26ai2.vip
      1        ONLINE  ONLINE       rac-26ai2                STABLE
ora.rhpserver
      1        OFFLINE OFFLINE                               STABLE
ora.scan1.vip
      1        ONLINE  ONLINE       rac-26ai1                STABLE
ora.scan2.vip
      1        ONLINE  ONLINE       rac-26ai1                STABLE
ora.scan3.vip
      1        ONLINE  ONLINE       rac-26ai2                STABLE
--------------------------------------------------------------------------------
4.2 Connecting to the Database and Verifying PDBs
Launch SQL*Plus as the oracle user and check the status of the PDBs.
su - oracle
sqlplus / as sysdba

SQL> show pdbs

    CON_ID CON_NAME                       OPEN MODE  RESTRICTED
---------- ------------------------------ ---------- ----------
         2 PDB$SEED                       READ ONLY  NO
         3 PDB01                          READ WRITE NO
Troubleshooting
| Situation | Cause | Resolution |
|---|---|---|
| Failed during Prerequisite Check | Improper OS settings / Insufficient resources | Check error details, fix /etc/sysctl.conf or permissions, and retry. |
| runInstaller does not launch | Improper X11 forwarding or DISPLAY variable | Execute xhost + or verify appropriate IP specification. |
| ASM disk not found | Insufficient permissions for oracle user | Verify if usermod -a -G asmdba oracle has been executed. |
| Node connectivity error in DBCA | Improper SSH trust relationship | Verify if passwordless SSH is possible for the oracle user as well as grid. |
Operational and Security Notes
- Risk: In 26ai, the CDB/PDB configuration is standard. Manage connection service names to the PDB appropriately.
- Scope of Impact: If writing to the shared disk fails, all instances are affected. Exercise extreme caution in managing ASM disk groups (DATA).
- Reversion Method: If it fails, use
dbca -silent -deleteDatabaseor manually delete the instance and clear the data files.
FAQ
Q: Can I use the traditional dbhome directory structure even in 26ai RAC? A: Yes. The path is arbitrary, but in this guide, we use /u01/app/oracle/product/23.0.0/dbhome_1 following the convention since 23c.
Q: Are there any items in the “Perform Prerequisite Checks” that can be ignored? A: In principle, you should fix “Failed” items even in a verification environment. If it is a “Warning,” it might be ignorable depending on the environment, but it is recommended to resolve it whenever possible.
Q: ORA-15055 (ASM error) occurred during database creation. A: Verify if the oracle user belongs to the ASM group (such as asmdba) and if the ownership is correctly set in the udev rules for /dev/sd*.
Summary
- Direct extraction into the Home directory is required due to image-based installation.
- “Failed” items in the “Perform Prerequisite Checks” must be fixed to pass the re-check.
- Configure DBCA assuming a CDB/PDB structure.
- It is critical that ASM group permissions are correctly granted to the
oracleuser.
This completes the basic construction of Oracle 26ai RAC. Let’s start advanced database operations utilizing AI features.
This article explains the process targeting Oracle AI Database 26ai (screens and default values may differ for other versions).
コメント